
Why a Damp Patch Appears Away from the Leak
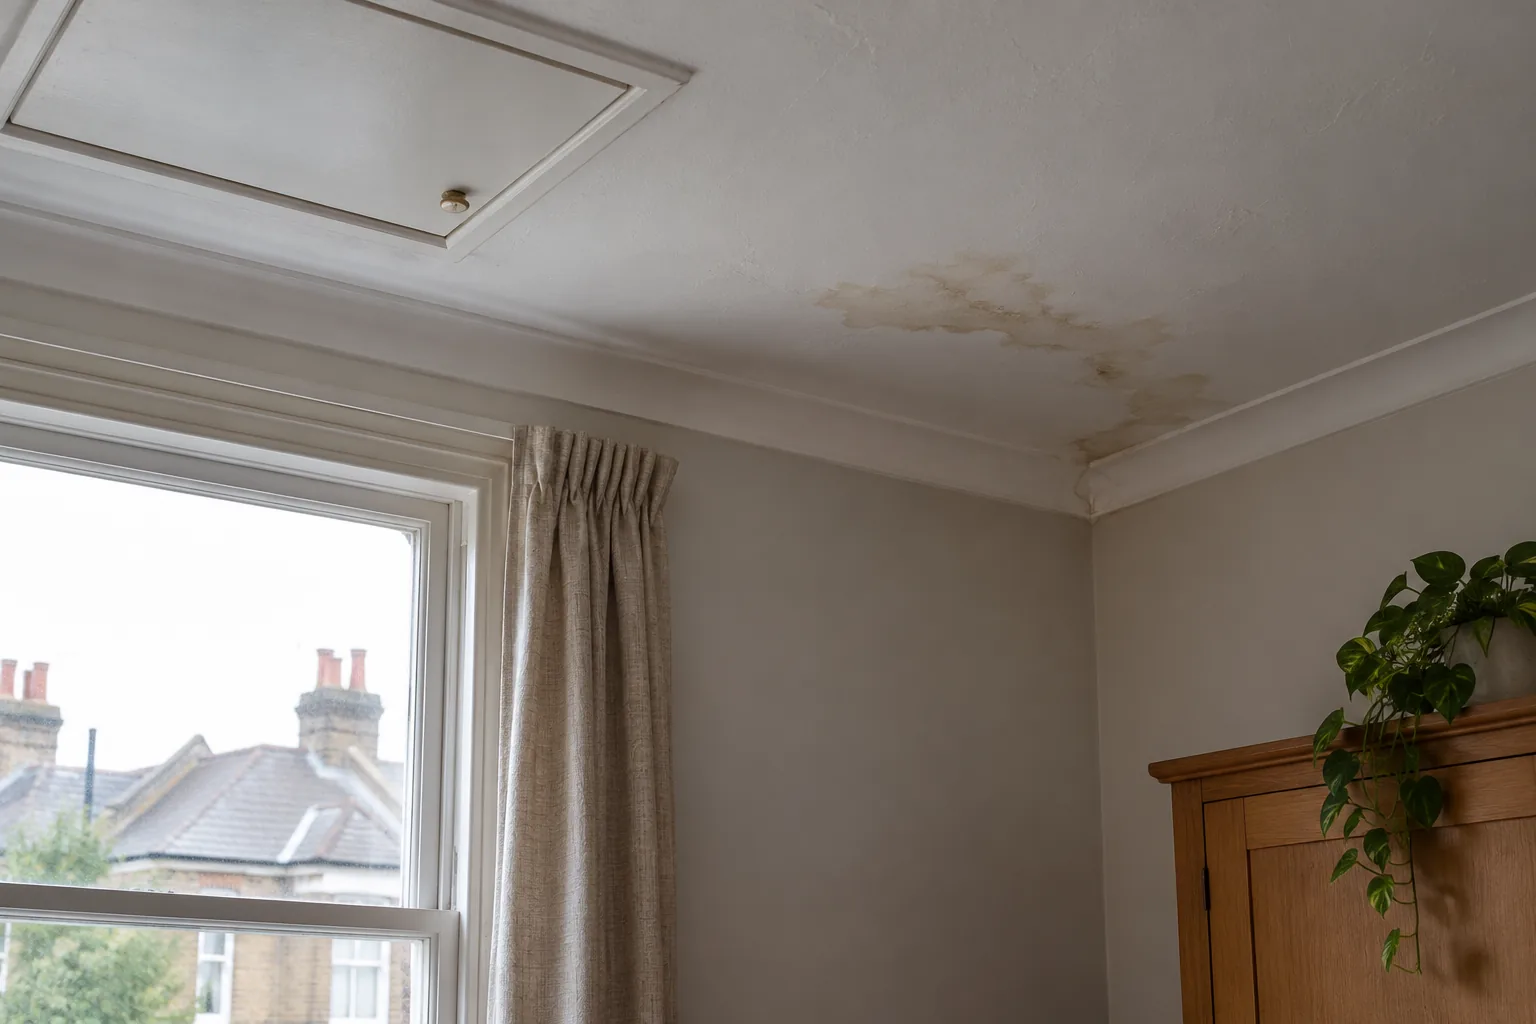
A brown mark appears halfway across the bedroom ceiling. The roof edge is several feet away, and the room above looks dry. It is tempting to search directly above the stain and, finding nothing obvious, assume that the roof cannot be involved. Water does not always take a straight route. The place where it enters a building, the route it follows and the place where it finally shows on a finished surface can all be different.
That does not mean every displaced patch is a roof leak. A pipe, rain entering around an external detail, condensation in a concealed void or moisture left from an earlier incident can create similar marks. The useful question is: what route could connect the source to this exact point, and what evidence would distinguish it from the alternatives?
The visible patch is the end of a route
Interior plaster and paint show where water has reached a surface and remained long enough to leave a mark. They do not identify where the water first entered. Above a ceiling, liquid may run along a timber joist, a pipe, a cable sleeve or the upper face of plasterboard. At a joint, fixing or low point, it can drip through. A stain then forms there, sometimes well away from the defect that started the problem.
The route is shaped by gravity, but gravity acts on the surfaces water meets. A joist that appears level may slope slightly. A service pipe may dip before turning. A plasterboard joint can offer an easier path than the board beside it. In a wall, water may move behind a lining, through a crack or along the boundary between two materials before becoming visible. The smallest opening is not necessarily the place where the room shows the largest mark.
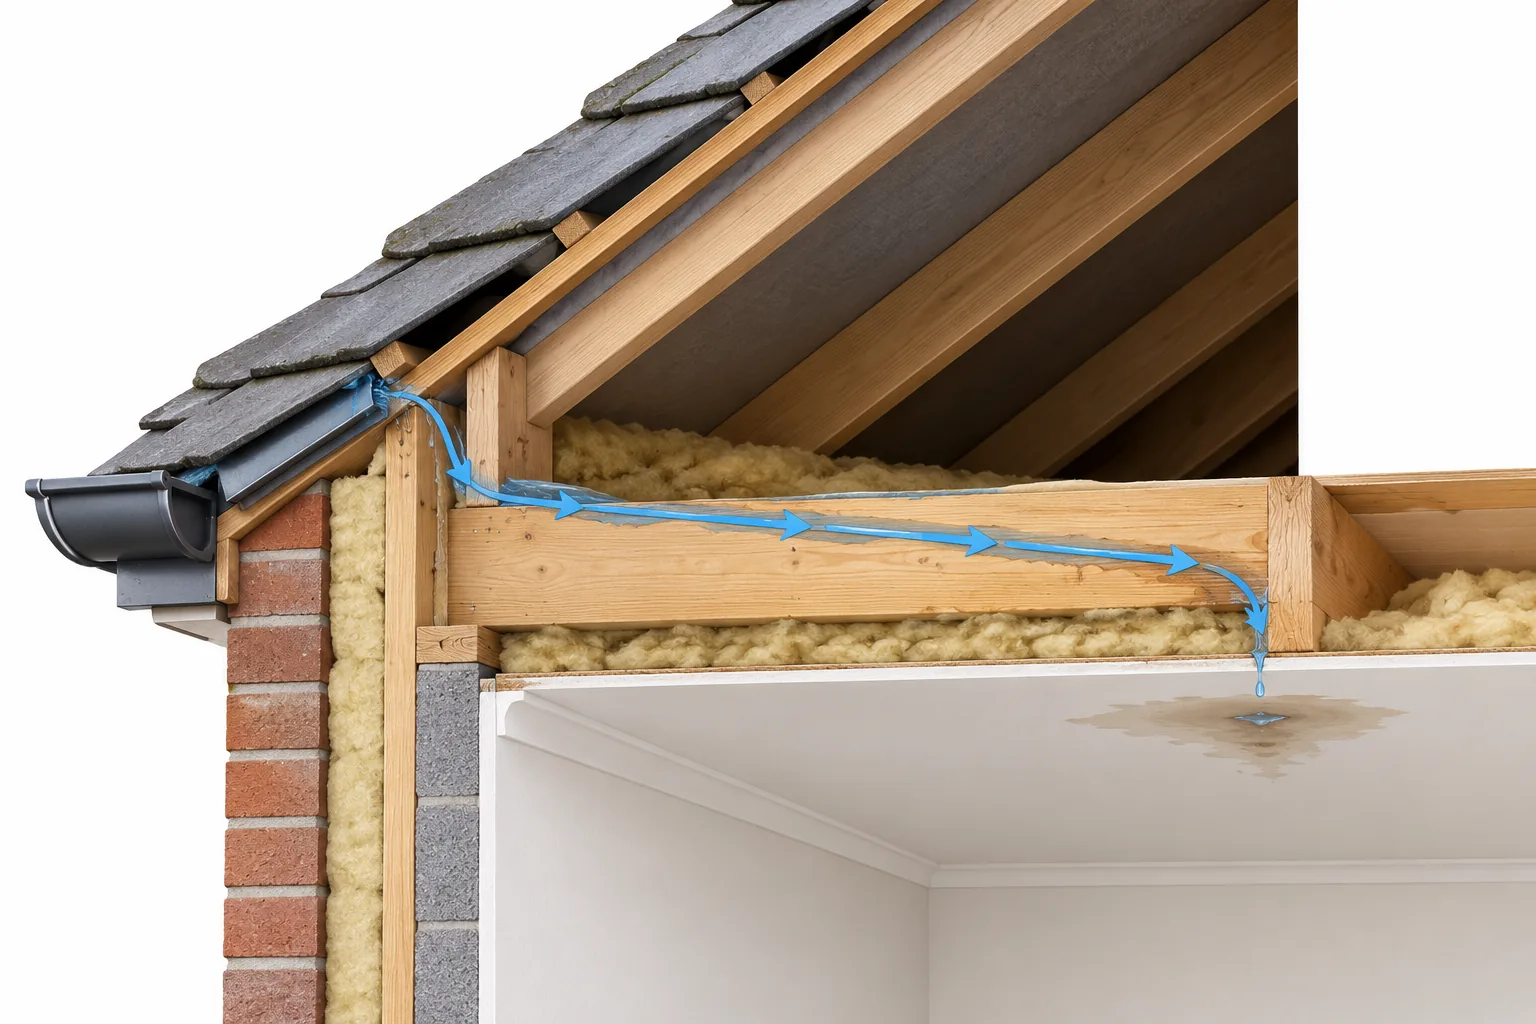
The illustration shows one possible route rather than a diagnosis of any particular property. Building materials also absorb and release moisture differently. A painted surface may hide early dampness while an adjacent unpainted edge darkens quickly. Insulation can hold water above a ceiling. Porous plaster may spread a stain beyond the point of the drip. In an older building, salts within plaster can leave discolouration after the material has dried. The outline visible today can therefore reflect both water movement and the finish’s response to it.
Four routes worth considering
Across a ceiling void
Rain may get past a roof junction or a defective flashing, then travel along a rafter or joist before reaching the ceiling lining. The mark may appear near a light fitting, board joint or cornice rather than directly below the external defect. A roof space inspection can sometimes reveal a wet timber, a trail on the underside of a roof covering or localised damp insulation. Safe access matters: an occupant should not step between loft joists or disturb electrical fittings to pursue a stain.
Behind a wall lining
Water entering at a window perimeter, parapet or external wall junction can pass behind plasterboard or old plaster. It may emerge where the lining meets a skirting board, a socket recess or a colder section of wall. This is one reason a low stain is not automatically evidence that moisture rose from the ground. Its height is a clue, but the route and timing need checking.
Along pipework and fittings
A slow plumbing leak need not drip beneath the damaged connection. Water can follow a pipe before dropping from an elbow or bracket. In flats, the pipe may be in a shared service void or belong to a room above. If the mark changes after a bath, shower, heating cycle or appliance use, record that relationship. It can be more useful than the patch’s shape alone. Our hidden leak checks page explains how we approach concealed moisture where access is limited.
Across or within an absorbent material
Plaster, timber, insulation and floor layers can spread moisture before a painted surface shows it. An earlier leak may also leave a stain that becomes more obvious as decoration ages, even after the source is repaired. A fresh wet patch and an old dry stain call for different next steps. Touch, colour and a single meter reading are not enough on their own to make that distinction reliably.
Timing often tells more than position
Before opening finishes, build a short record of when the patch changes. Photograph it from the same position, with the date and a ruler or another scale in frame. Note whether its edge grows, whether the surface feels damp and whether a musty smell is present. A simple sketch can show the stain’s position relative to windows, radiators, bathrooms, roof edges and exterior walls.
Look for repeatable relationships:
- After rain: note whether the change follows heavy rain, wind-driven rain or a particular wind direction. A rain-related pattern can point towards the building envelope, but it does not locate the defect by itself.
- After water use: consider showers, baths, sinks, washing machines and heating. A delay between use and staining may occur while water travels or accumulates.
- On cold mornings: check for condensation on glass, cold corners and nearby surfaces. Water forming on a cold surface can be mistaken for ingress, especially in a poorly ventilated room.
- After a repair: record whether the patch is drying, unchanged or enlarging. Staining can remain after the material is dry; active wetness needs a closer look.
If water is dripping near electrics, a ceiling is sagging or an active leak is spreading, treat it as urgent. Keep clear of the affected fitting or ceiling area and arrange the appropriate electrical, plumbing or building help. Do not cut into a ceiling simply to confirm a theory.
Why a moisture meter is only part of the investigation
A meter can help compare areas and monitor changes, but its display is not a map to the source. Different materials respond differently. Salts, metal components and surface conditions can affect a reading. A high reading at the stain says something about that location under those conditions; it does not prove that water entered directly above it. Equally, a low surface reading does not rule out moisture behind a lining or insulation.
A useful survey combines the history of the patch with observations of the wider building. Readings can be taken in a consistent pattern across comparable materials, then interpreted alongside visible defects, weather exposure, plumbing routes, ventilation and temperature. Historic England’s guidance on assessing damp discusses why measurement methods need careful interpretation, particularly in older construction.
An inspection of damp conditions may narrow the likely route without opening any finishes. Sometimes it cannot. If the evidence points into a concealed void, the next recommendation may be targeted access, a plumbing check, roof inspection or monitoring through another weather cycle. A responsible report should say what was observed, what remains uncertain and what would test the leading explanation.
A practical sequence before making repairs
Start by separating the effect from the suspected cause. Mark the visible boundary of the patch on a dated photograph; avoid painting over it before there is a record. Check accessible areas above and beside it without dismantling the building. An overflowing gutter, wet loft insulation, staining beside pipework or persistent condensation elsewhere may provide context. Do not assume that the most visible defect is the only one involved.
Next, compare the timing with weather and water use for several days if the situation is stable. A patch that enlarges immediately after rain deserves a different line of enquiry from one that appears after every shower. If more than one mechanism is plausible, keep both on the list. GOV.UK’s damp and mould guidance recognises that homes may have multiple sources of moisture and that the underlying causes need to be addressed.
Only then choose a repair scope. Sealing a visible crack may be sensible if inspection shows it is the entry point, but sealing a crack merely because it is near a stain can leave the actual source untouched. Replastering and decorating should follow source repair and sufficient drying. If absorbent materials have been damaged, their condition may require separate assessment. When mould is present, mould inspection can consider the moisture source and affected surface together.
When a closer inspection is worthwhile
Seek professional help when the stain grows, returns after a repair, appears near electrical fittings, has no clear relation to an accessible source or involves a shared building element. The same applies if several rooms show symptoms, a ceiling lining feels soft, or mould and odour suggest that material behind the finish may be affected. In a flat or conversion, identifying who can provide access above or outside the affected room is often part of the practical work.
A good inspection does not begin by naming a type of damp from the colour of a photograph. It starts with the building layout, the chronology and a set of possible moisture routes. The aim is to make the next action proportionate: repair an identified defect, monitor a stable condition, arrange access to a concealed area or call the relevant trade. If you need help tracing a recurring patch in a London property, contact our team with the room, location, recent weather or water-use pattern and any repairs already completed.